This post may contain affiliate links. As an Amazon Influencer, I earn from qualifying purchases.

This easy Halloween Fudge is a no-bake freezer recipe that is ready in 15 minutes, leaving plenty of time for decorating.

It's no secret to Dinner-Mom readers that a sweet ending is considered an essential part of a delicious dinner...at least at my house, especially during the holidays.
We try to keep it healthy around here, except on special occasions, like Halloween. That's when we make things like Candy Corn Sugar Cookies and Harry Potter Golden Snitch Truffles.
I've never shied away from baking for events because my girls never fail to pop into the kitchen and share in the fun. And making memories is what it's all about!
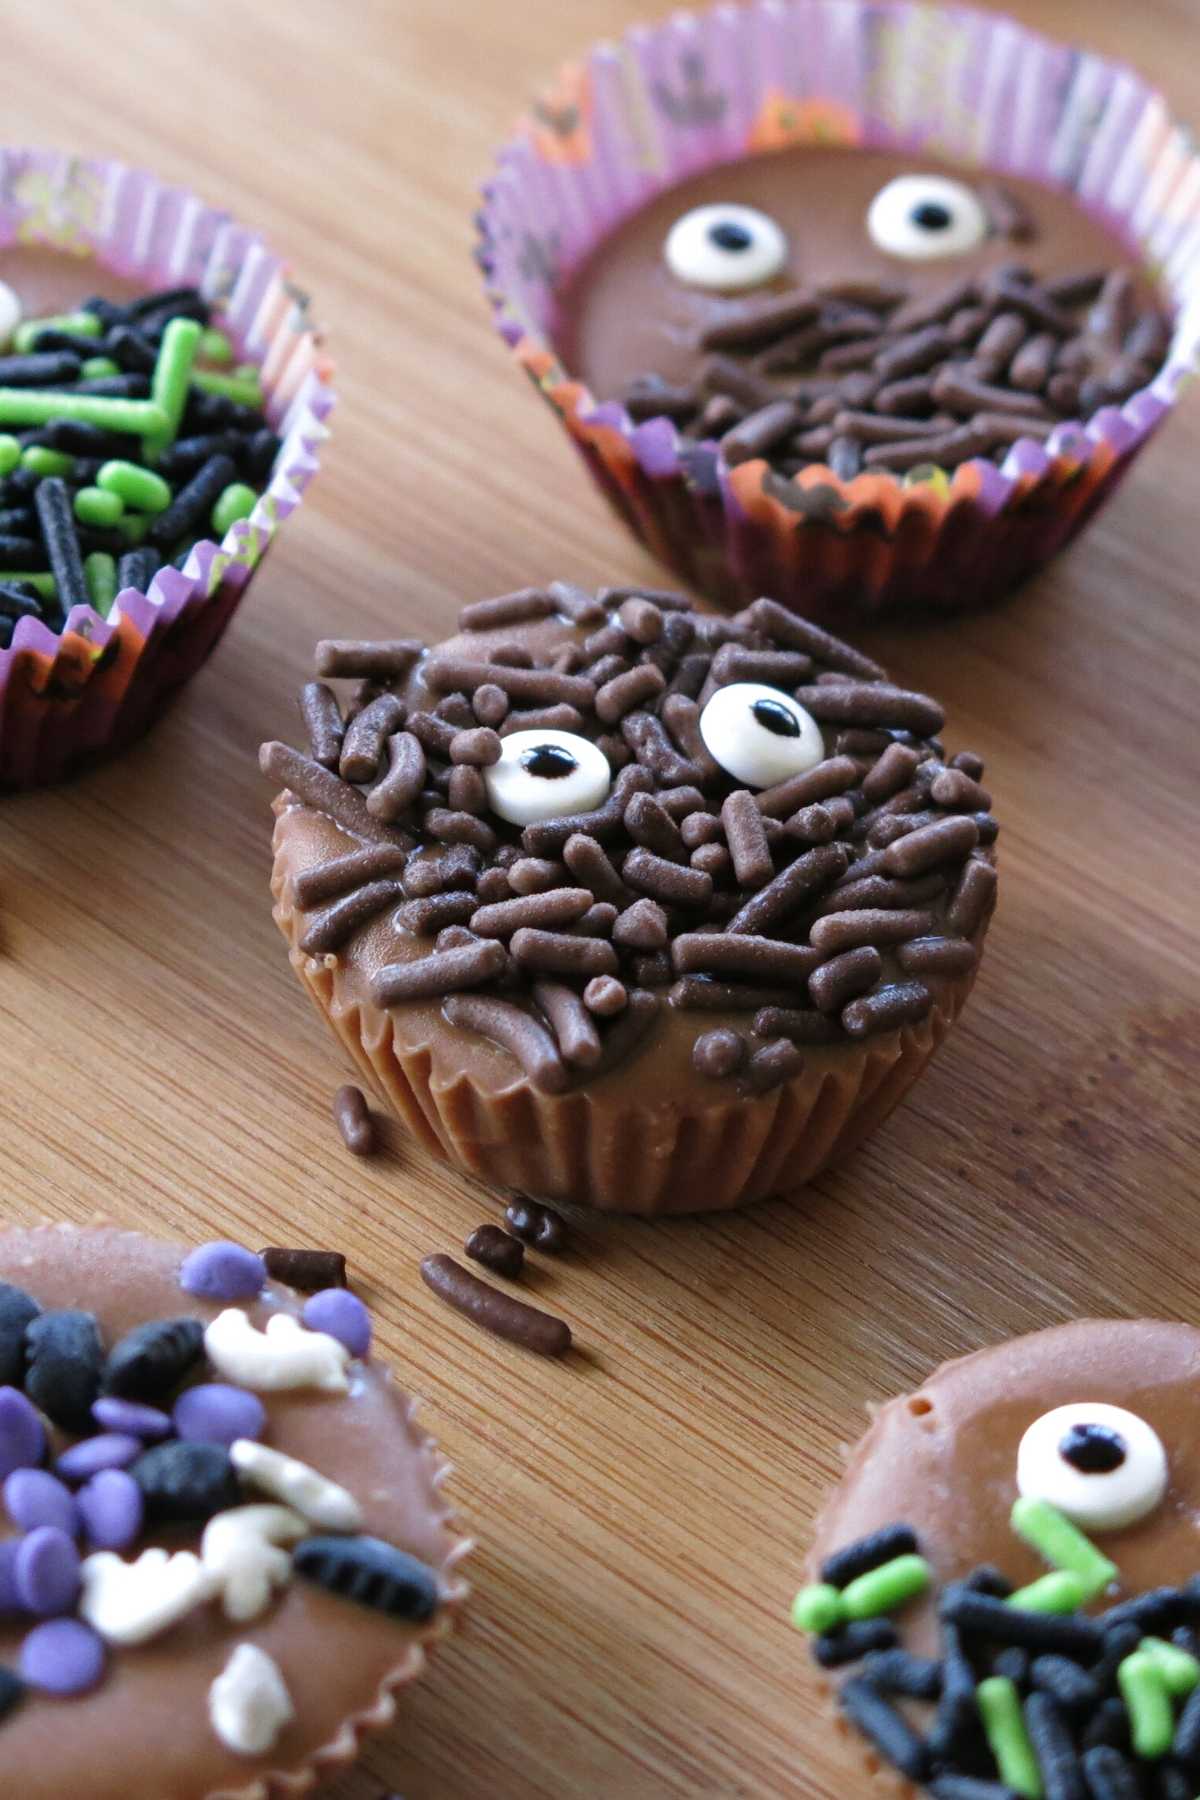
But I'm particularly fond of this simple Halloween fudge recipe that doesn't even require you to heat up the stovetop. Most of the time is spent coming up with ideas to decorate the cute little cups of chocolate fudge.
Ingredients and Substitutions
Here's what you'll need to make this Halloween fudge recipe:
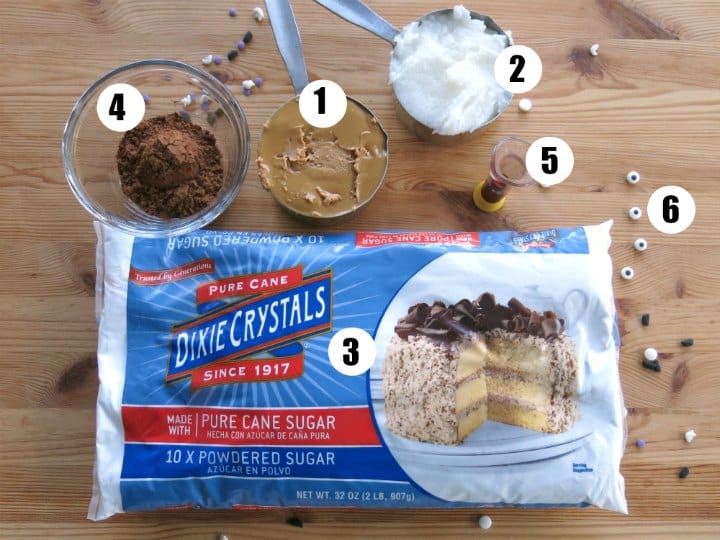
- Almond Butter - Peanut butter, cashew butter, sunflower seed butter, or any nut butter will work. Use unsweetened if possible!
- Coconut Oil - Replaces the butter you would normally find in fudge. It helps it to quickly firm up, too!
- Powdered Sugar - Sweetens and adds bulk.
- Do not use granulated sugar, or the result will be grainy.
- Artificial sweeteners can replace sugar one-for-one if you're used to making this type of substitution. My head did a somersault afterward.
- Another option is combining traditional powdered sugar with a sugar replacement like Better Than Sugar, which contains Erythritol and Stevia Leaf Extract.
- Use organic powdered sugar to keep the recipe vegan.
- Cocoa Powder - unsweetened.
- Vanilla Extract
- Sprinkles - Get creative with what you have on hand. Halloween candy can be used to decorate the fudge or chopped and mixed in. Chocolate chips, eyeballs, and candy corn are all fun. Dress up this recipe for any occasion. Of course, you can leave them off too!
Directions with Pictures
It takes less than 15 minutes to make and freeze Halloween fudge. Here's what you need to do.
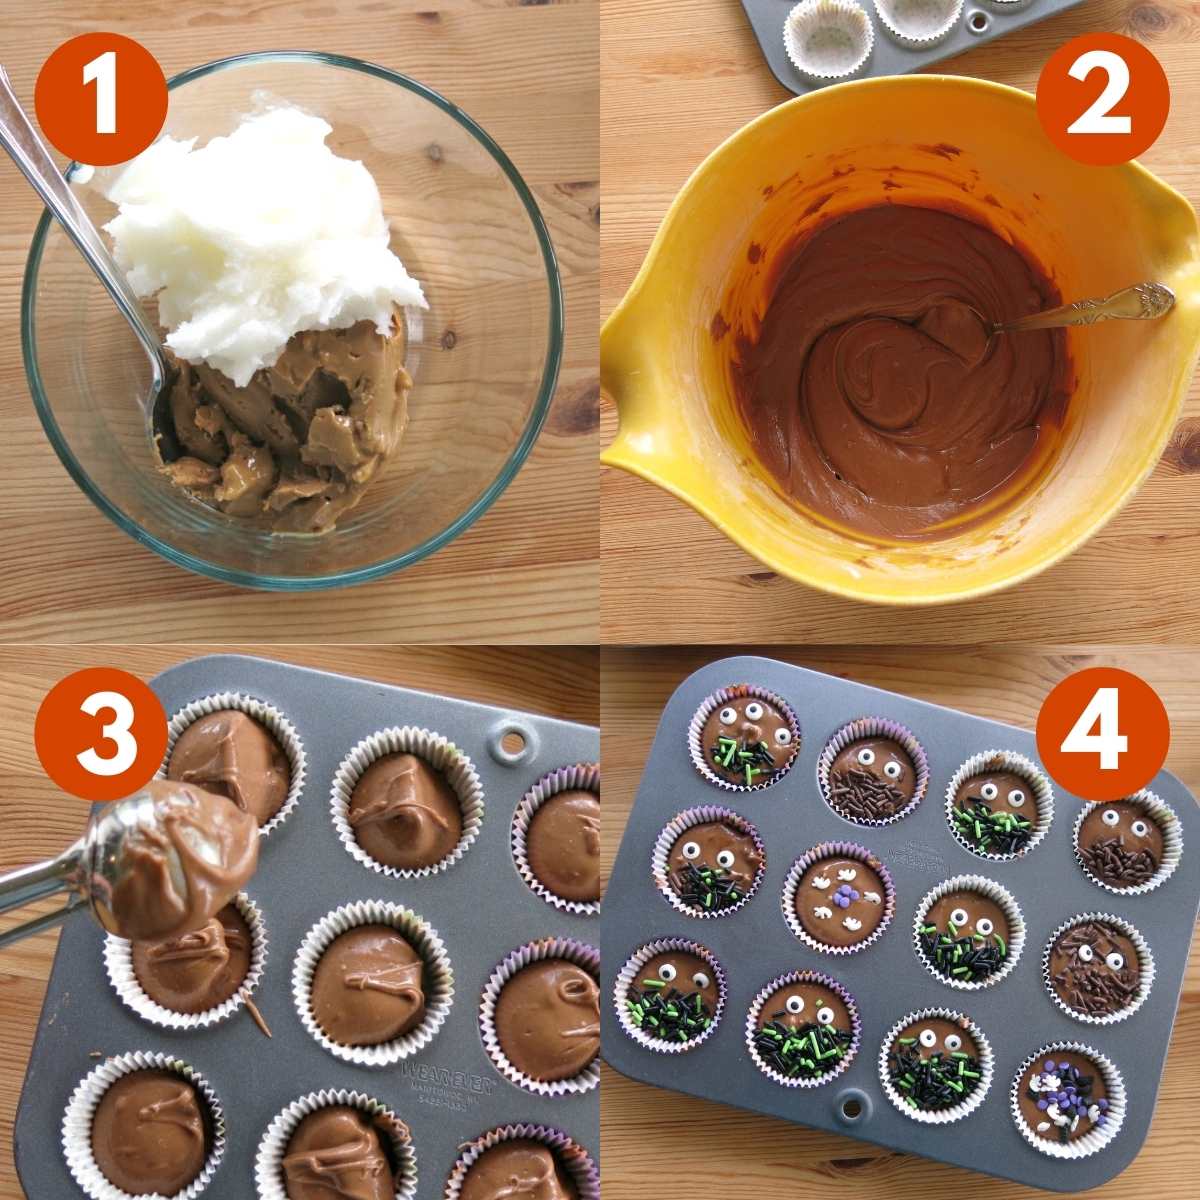
- Melt peanut butter and coconut oil in the microwave oven and stir to combine. It will take about 30 seconds to a minute, depending on microwave wattage. The coconut oil will turn into a clear liquid.
- Stir powdered sugar, cocoa powder, and vanilla extract into the wet ingredients.
- Portion the batter into mini muffin tins. A festive paper cupcake insert makes the fudge easy to handle later.
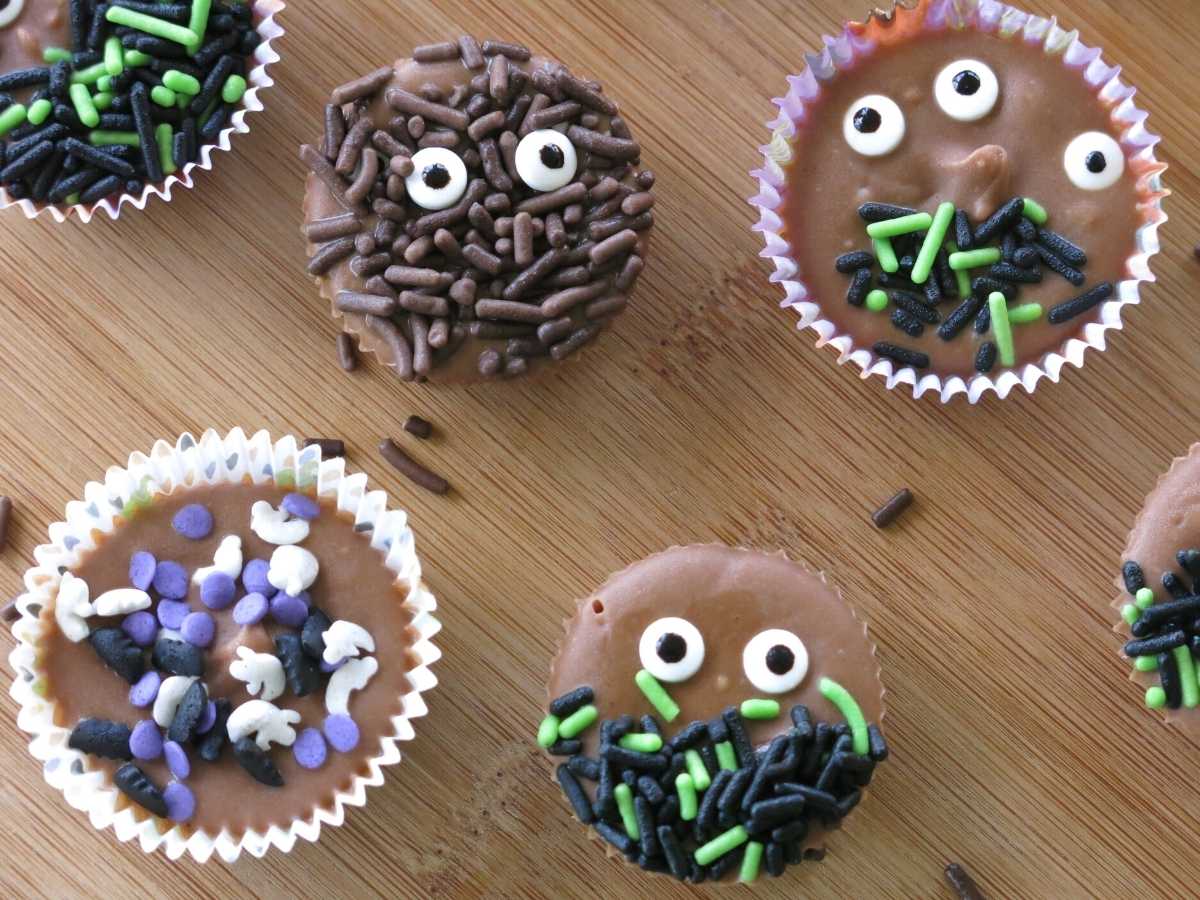
- Decorate the top of the fudge with sprinkles, candy, and a well-placed eye. Put the pan in the freezer to chill for about 10 minutes or until the almond butter fudge sets.
Note: The sprinkles go on BEFORE it goes into the freezer. Very gently press the sprinkles down a little so they freeze in place.
Alternative presentation: Line the bottom of an 8 x 8 or 9 x 9 baking dish with parchment paper. Spread the fudge mixture evenly over the bottom and decorate. Cut into squares after it has hardened.
Storage
Once the Halloween fudge is firm, keep it in the refrigerator or freezer until you are ready to enjoy it. The fudge won't melt at room temperature. However, it will soften a little and be messy to touch the longer it stays out.
Store in an airtight container for up to a week in the refrigerator or about 2-3 months in the freezer.
More Halloween Recipes

Did you make this recipe?
Please leave a rating and tell us how you liked it!
📋 Recipe

Easy Halloween Fudge Recipe
Ingredients
- ½ cup almond butter peanut butter, cashew butter, or your favorite nut butter
- ½ cup coconut oil
- 2 cups Powdered sugar gently spooned or sifted. See notes on substitutions.
- 2 Tablespoons cocoa powder
- ½ teaspoon vanilla extract
- Assorted sprinkles and decorations including candy, chocolate chips and icing.
Instructions
- Place almond butter and coconut oil in a microwave-safe bowl and cook on high in the microwave for about 30 seconds or until oil is melted.
- Stir until smooth and creamy.
- Slowly add remaining ingredients to bowl and stir until smooth.
- Spoon fudge mixture into mini cupcake tins with liners.
- Decorate with sprinkles, chocolate chips, candy and icing. Gently press sprinkles in place.
- Place fudge in the freezer for 10 minutes to chill and harden.
- Store in the freezer or refrigerator until serving time.
Notes
- DO NOT use granulated sugar or fudge will be grainy.
- Use artificial sweeteners with caution. We like it best when we used a half and half combination of Better Than Sugar Powdered Sugar and Conventional Powdered Sugar.
- Instead of using a mini muffin tin, freezer fudge can be spread thinly in the bottom of an 8 x 8 or 9 x 9 baking dish lined with parchment paper and cut into squares after it's chilled.
- Paper inserts make serving the fudge make serving easy.
- Use a toothpick to smooth out the top if necessary.
- Keep fudge refrigerated or in the freezer when you're not enjoying it.
Nutrition
This recipe was originally published on 10/10/16 and was updated to improve the reader experience.

Serena
These are so cute! Love the little eyes and sprinkles!
Bobbi | Bobbi's Kozy Kitchen
I love fudge and these are so cute!
Liz
Such an adorable Halloween treat. My family would never say no to fudge!